Working in Leeds Part 2: The design
0 Written by Lisa on 3rd Nov 2011 in Design Tips, From the drawing boardIf you read my blog post on Tuesday then you’ll know a little bit about this project already – a day in Leeds last Friday to work on a “Garden Designer in Your Home” project. Today I ‘m going to talk to you about the process we went through to develop the design and of course show you the final drawings and concept sketches.
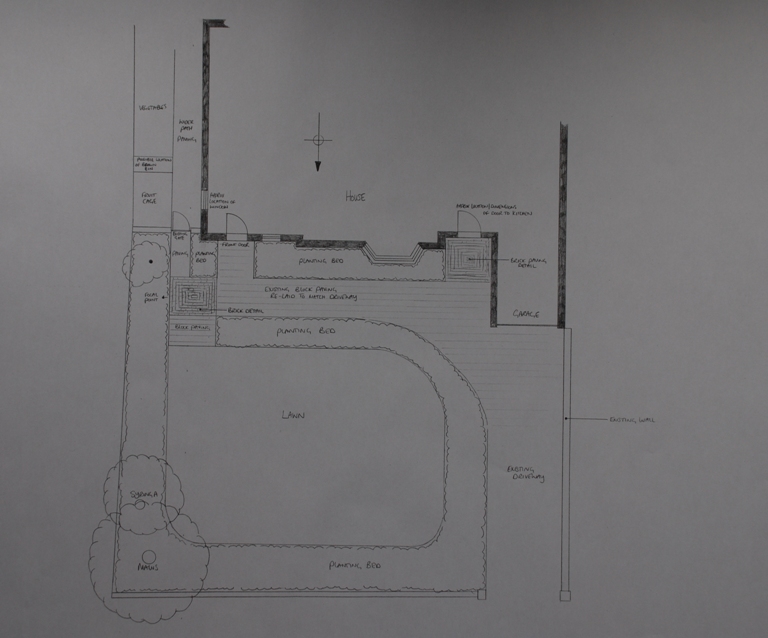
The starting point for any project like this is the survey. Within the scope of this project there were some elements that were to remain in place so it was also important to ensure that these were plotted accurately. The front garden was quite straight-forward because although they wanted to improve the approach to the house, essentially we were only making some small modifications to what is currently there.
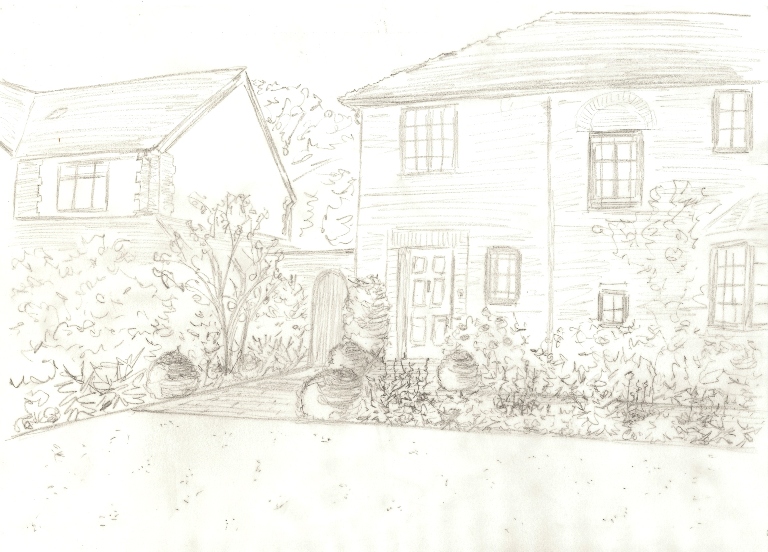
At the moment, when you approach the house, the obivious door to go to is the one next to the garage. This door actually leads to the kitchen so my clients wanted to make the approach to the real front door (on the left) clearer so that visitors know where to go. You will notice that we have introduced some paving detail outside the door by the garage and also at the corner where the side access goes round to the back garden. These are subtle changes but will make quite a difference. Subconsciously, when walking along the pathway visitors will want to follow the route that has a consistent paving pattern.
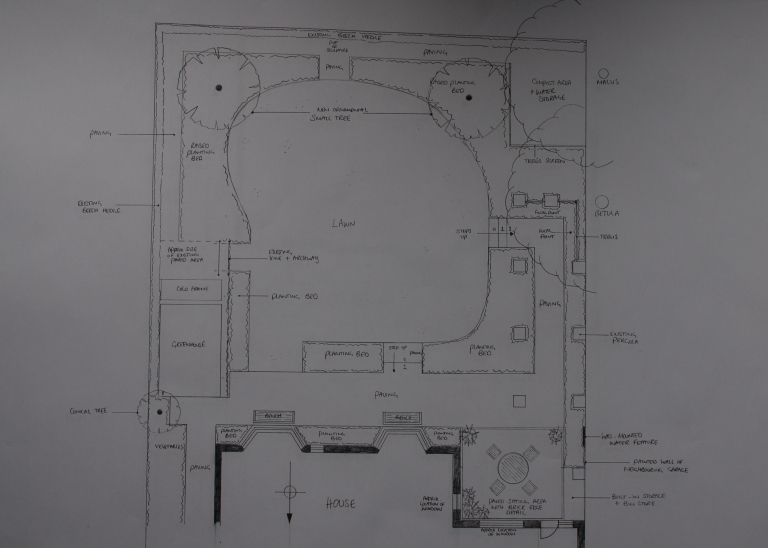
The back garden was a little more complex to work through as there are some structural elements already there that my clients wish to keep…
The main structural element in the back garden is the brick pergola that runs from the back door. At the moment this sits within the existing paving so other than providing shade on a hot day, it doesn’t really fulfill a function and in order to get to the other end of the garden it’s easier to walk around it. We have now set the brick pillars within the planting beds to create a proper pathway that leads through to some sort of focal point at the end….something that will draw you down there to take a look.
You’ll note, compared to the pictures in the previous post, that we have also separated the lawn from the end boundary to give depth and make the garden feel bigger. The secret pathway at the end creates a focal point from the house and also allows for a hidden pathway to the utility area in the bottom right hand corner.
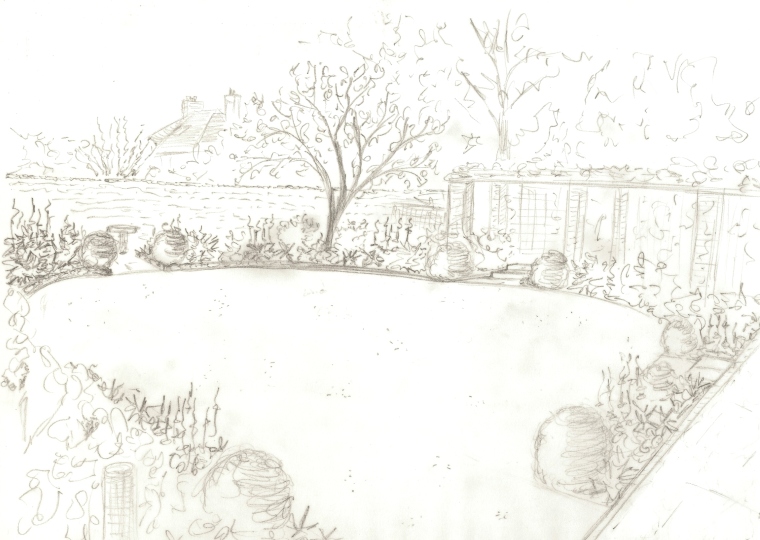
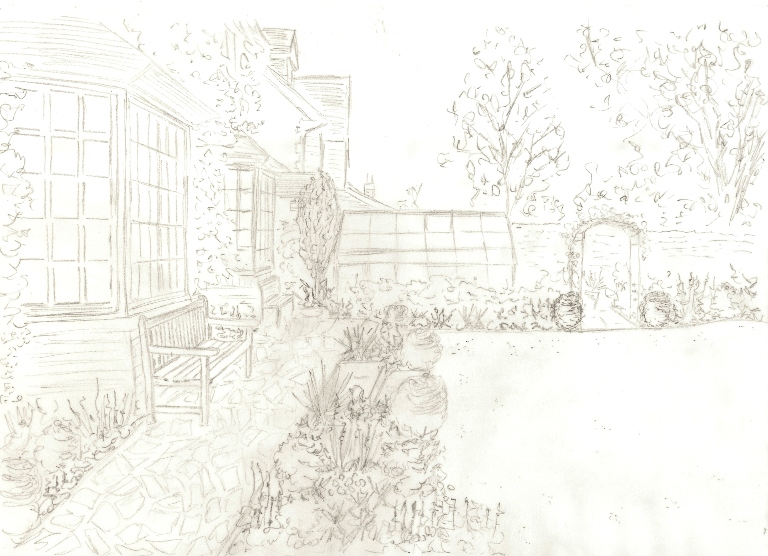
The other element to remain in place is the greenhouse and vine – this is the proposed new garden looking across from the pergola…
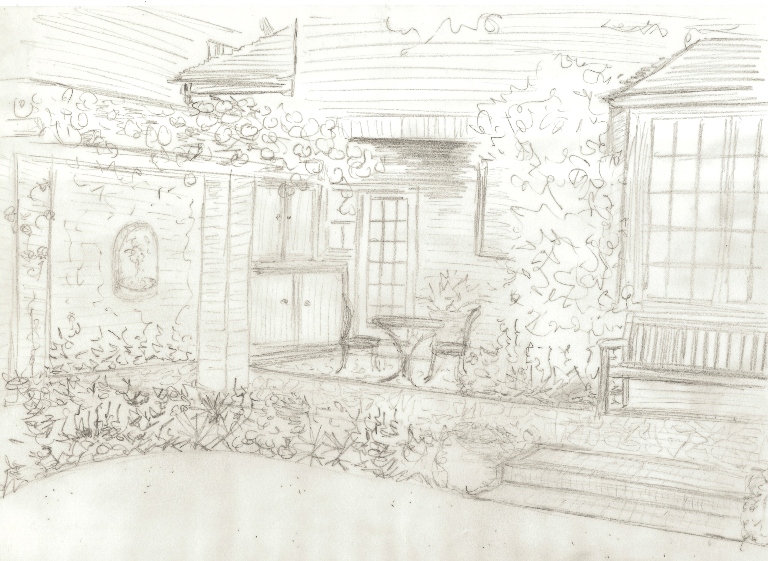
The last area I wish to feature here is the covered corner outside the back door. Currently, because it’s dry under there, it’s used as a dumping ground for tools and other things. The kitchen window looks out on this area too so we felt that it could really do with smartening up and, more importantly, really needs to have a function. So, this will be the new seating area…
The built-in storage will take care of the clutter and because my clients really fancied some sort of water feature, we have incorporated a wall-mounted fountain that will be mounted on the (soon to be painted) wall of the neighbouring garage. The York stone paving will be lifted and relaid and the paving bricks will be used for the paving details around the seating area and for the areas at the front.
It is both interesting and energising to work with clients in this way especially if they want to develop the garden themselves and just need some design input to get them going. It’s amazing what can be achieved in day!


 Welcome